Step 5: Placing An Order
Defining the Processing Boundary
If you have uploaded your own boundary files along with your point cloud and orthomosaic files, you can go ahead and submit your project for processing.
If you haven’t uploaded a boundary file, or want to choose a different area within the site to process, you can click on Draw to manually select it.
Our draw tool allows you to draw a polygon with multiple nodes so that you can more accurately choose your processing area, or you can also draw a line with your desired buffer area for linear or corridor projects.
You will get two facilities here Get Road Network and Check Imagery Availability. This can be useful to you incase you don’t have imagery and road network for your desired area of selection. With this you can request the road network and imagery base on availability. Refer screen below:
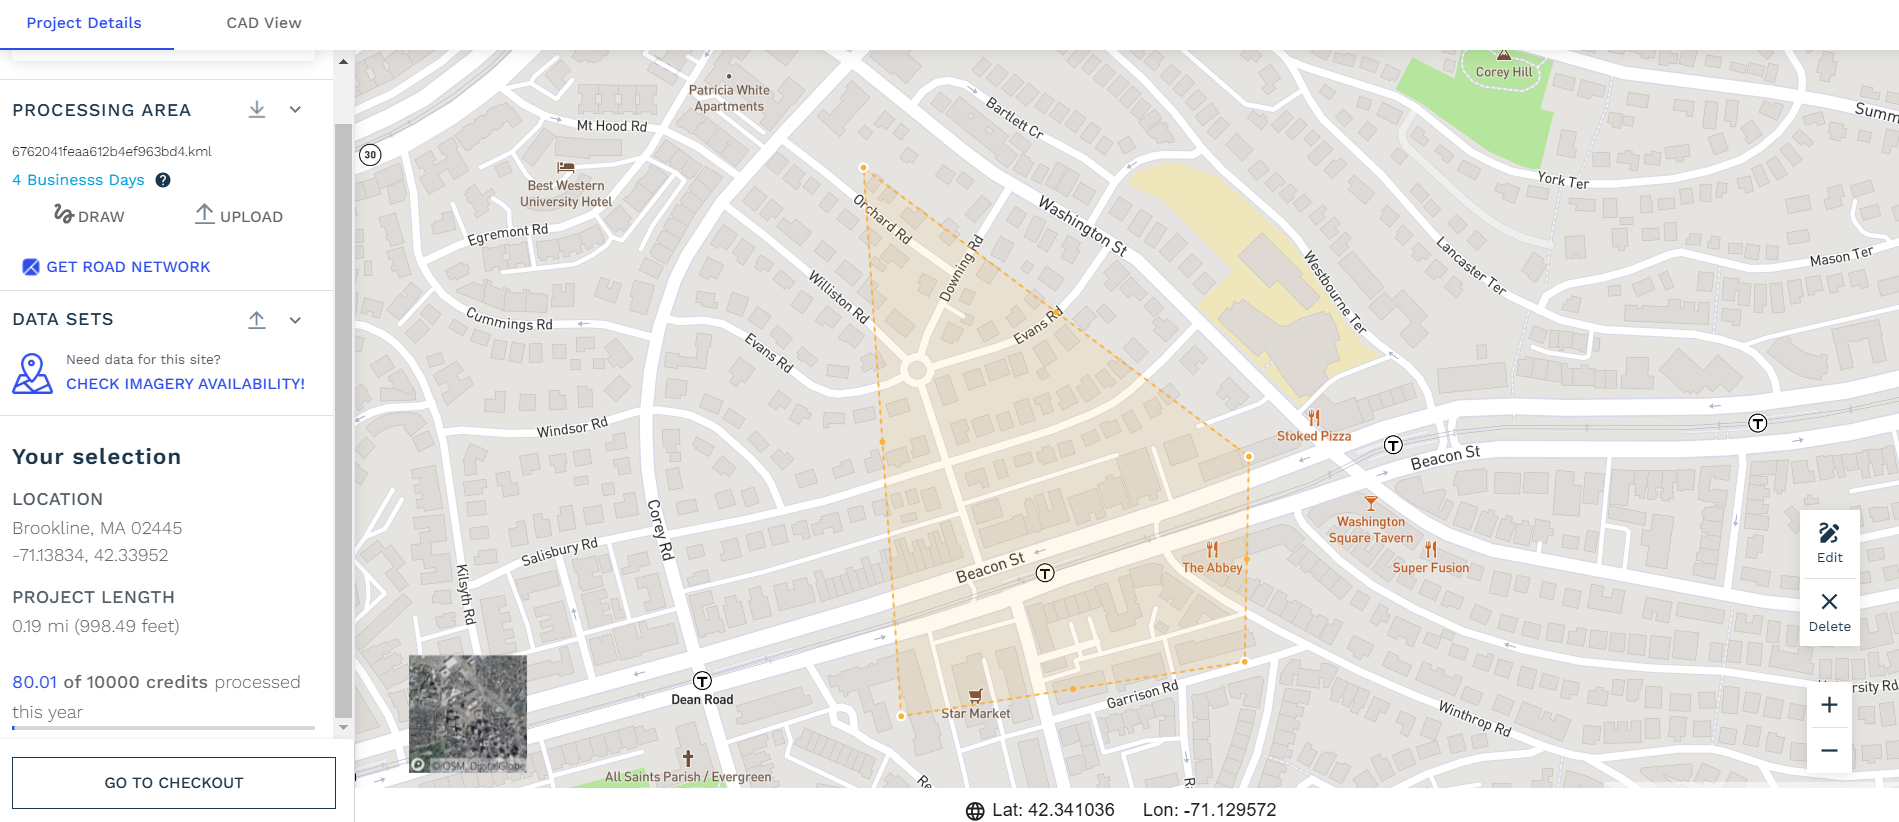
Map with base map behind the area of interest
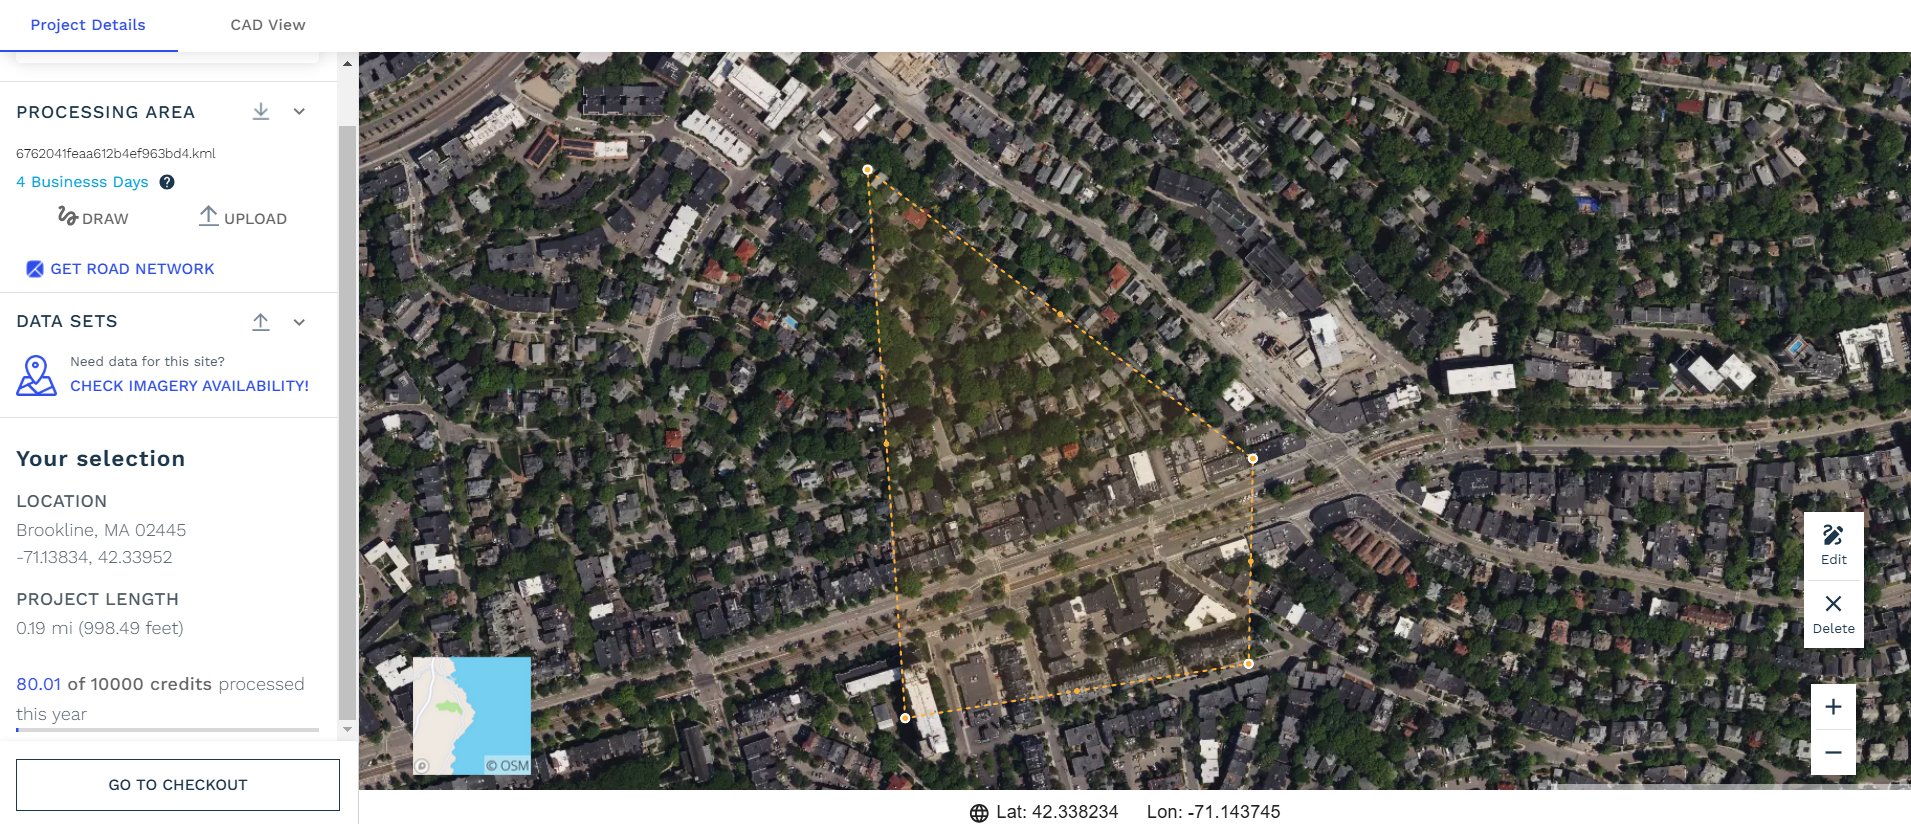
Map with satellite imagery behind the area of interest
Please make sure that you click on the Process Site button at the bottom of your Project Details page. You will then be redirected to an order confirmation page, at which point you will be able to select your desired CAD template, processing bundle, and any add-ons for that project.
Selecting the Processing Bundle
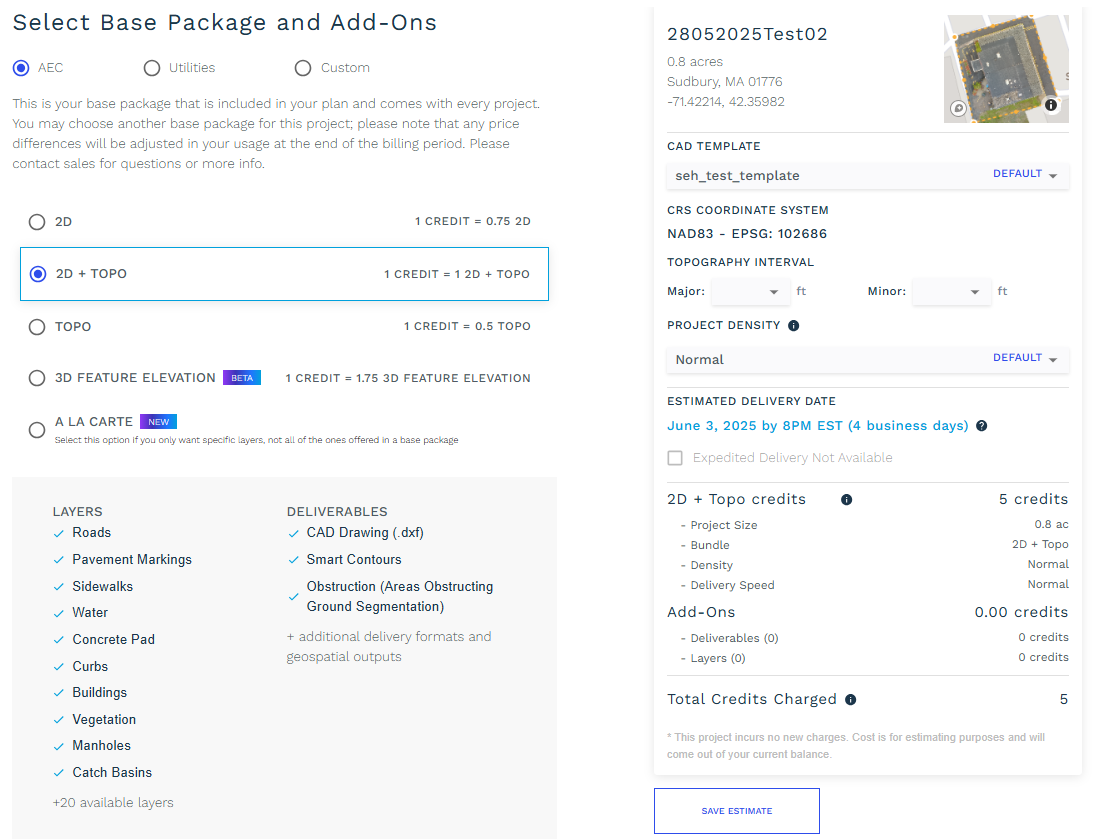
First, you will want to select the base package (processing bundle) that you want to be applied to that project. You can toggle between the four options to see what is included with each. In addition to that if your requirement is to extract utility data then there is another radio button “Utilities”. For standard (regular) data extraction you can select “AEC”. Utilities option will have 2 bundles 2D & 3D, either of which you need to select before finalizing layers & output. Layers in 3D option will be more compare to 2D. Kindly refer screen shot below:
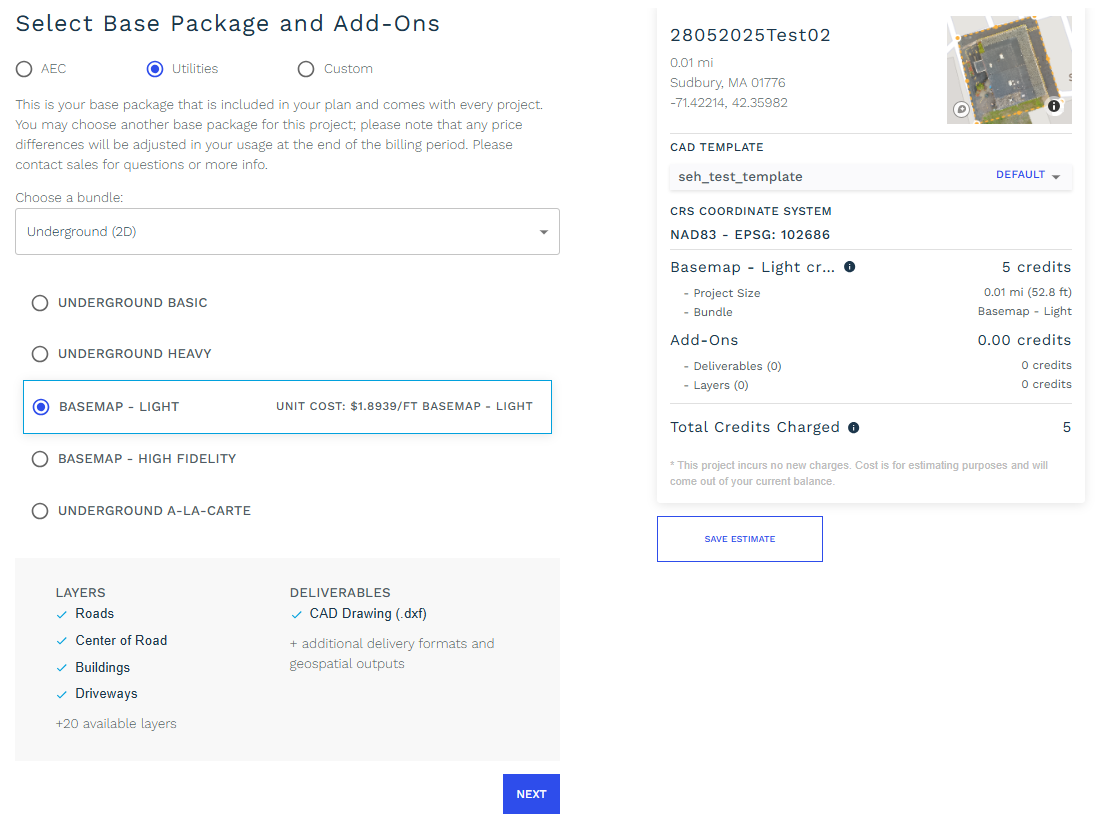
For more information on each of our bundles:
Selecting Add-Ons and Additional Layers
Next, you will be able to select any add-on layers and deliverables to be applied to that project. All of our add-ons (additional file types + any one-off layers) are charged from your existing bank of acres depending on the total processing area of your project. The price displayed for each add-on will be the total price for applying that layer or deliverable, based on the total area (acreage) of the project to be processed.
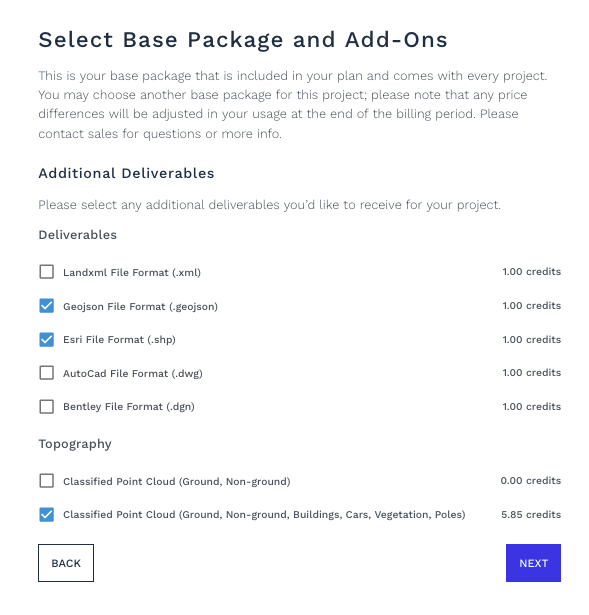
additional deliverables selection
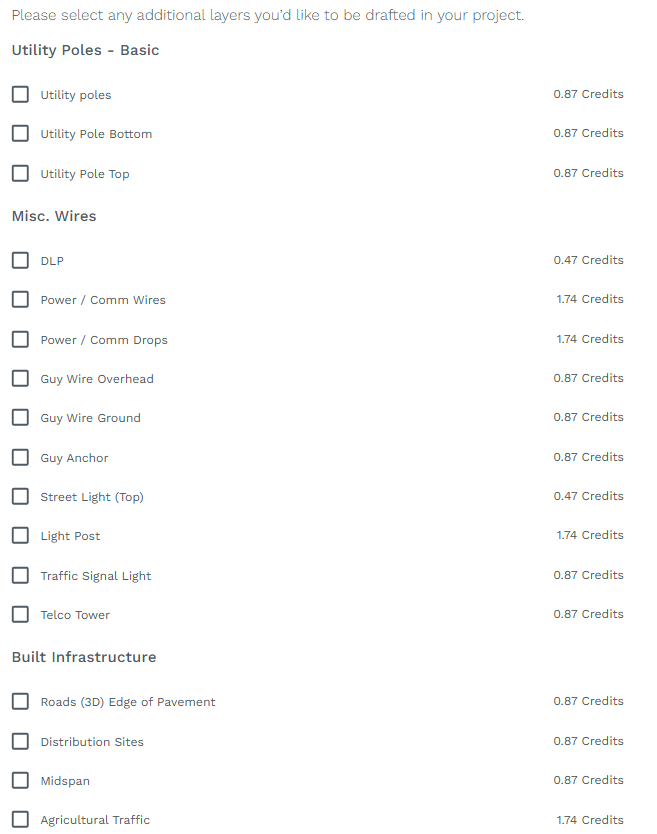
additional layers selection
Selecting a CAD Template
Next, you will be able to select your desired CAD template, in the project details box on the right side of your screen. If your selected bundle includes drafting for topography (major and minor contours), please indicate your intervals in the boxes provided.
If you do not select a custom CAD template, we will use your predetermined default, or the AirWorks default template if you don’t have any templates in your account. Learn more about our CAD templates feature here.
Once the above selections have been made, click the “CONTINUE” button in order details box on the right side of the page.
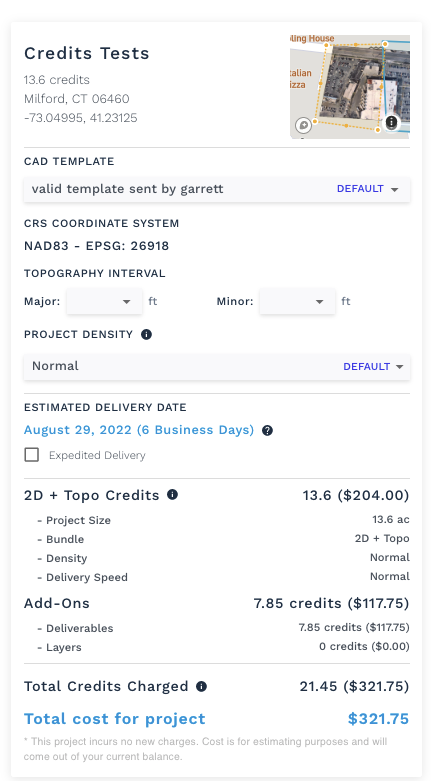
Selecting Topography Interval
Next, you will select your topography intervals Major and Minor depending on your project specifications provided that you have upload an .las file.
You can select between 0.25, 0.5, 1, 2, 5, and 10 feet intervals.
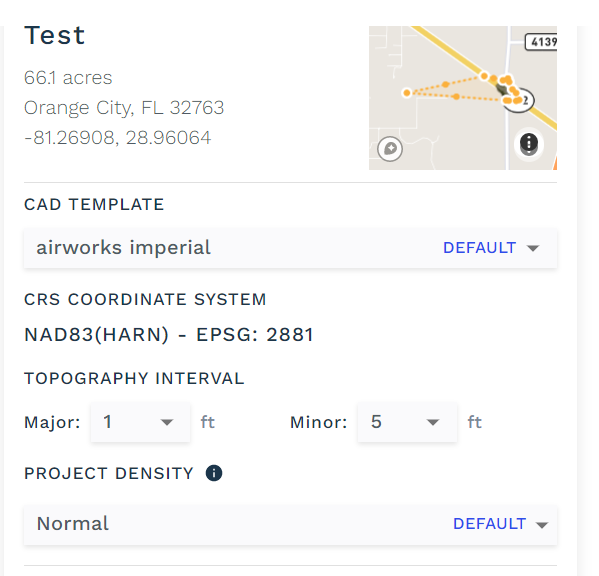
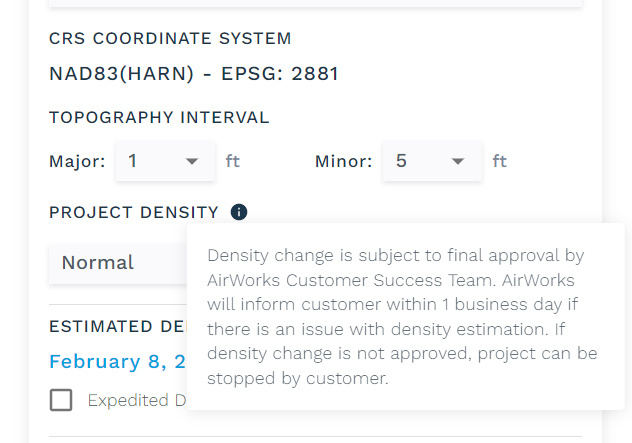
Selecting Project Density
Next, you will be able to select your project density based on the number of features in your project. Here is our knowledge base article of how to determine which density to choose for your project. As a reminder, your estimated date and acres charged will change depending on the selection of density.
Note: If you select the Topo only bundle, you will not be able to select low density.
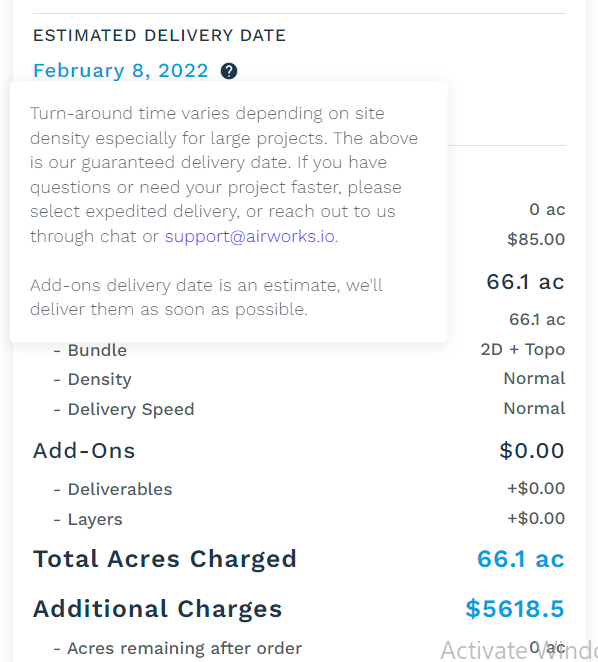
Estimated Delivery Date
Here we determine the estimate date of delivery turnaround time based on your project’s complexity. A link to our knowledge base article explains in further detail how long a project should typically take. You can request an expedited delivery and reduce your turnaround time by 1 day or 20% of the total project estimated date (whichever one is faster).
Additional Charges
If your order exceeds your remaining credits, you will be asked to pay for the difference with a credit card.
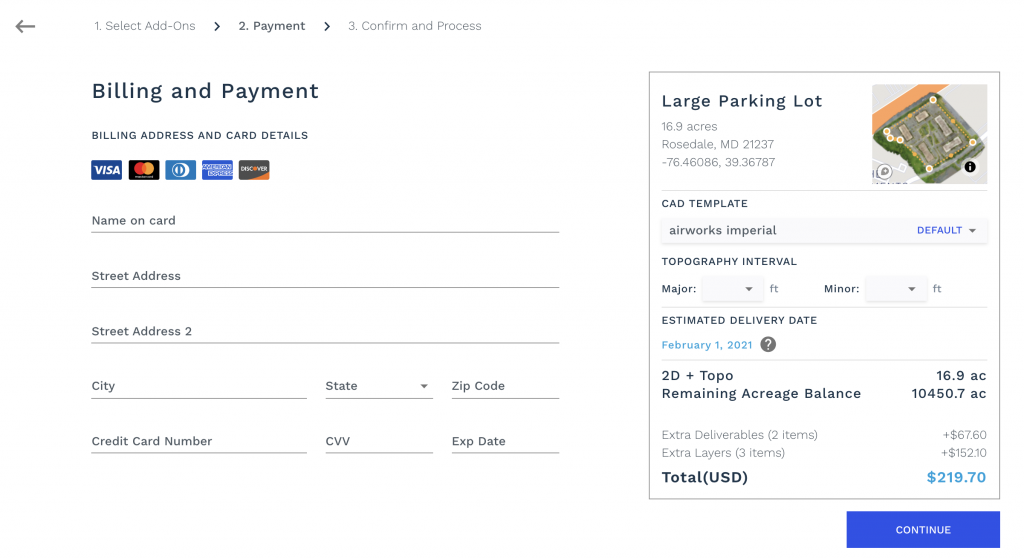
AirWorks credit card details & payment screen.
If your project and/or selected add-ons exceed your account's available acres, you will be asked to pay for the difference (the overage only) with a credit card. Please input your payment information and click on continue.
Renewing your plan and getting more acres added to your account is the best way to prevent overages and credit card payments. You may reach out to our team to get started on a subscription renewal before placing your order at sales@airworks.io.
The summary page will display all the relevant details for your project. Please note that we do provide an estimated delivery date for your final deliverables. This is calculated based on our current capacity and quality control backlog. We do our best to deliver by the date listed, but sometimes, depending on the size and density of the project, may deliver it earlier than expected.
Confirmation & Checkout

The above animation demonstrates the final confirmation screen before you can place your order. At this time, you can adjust your deliverables, add-ons and assign your order to the appropriate Team and Reference ID. You can only assign an order to a team you belong to.
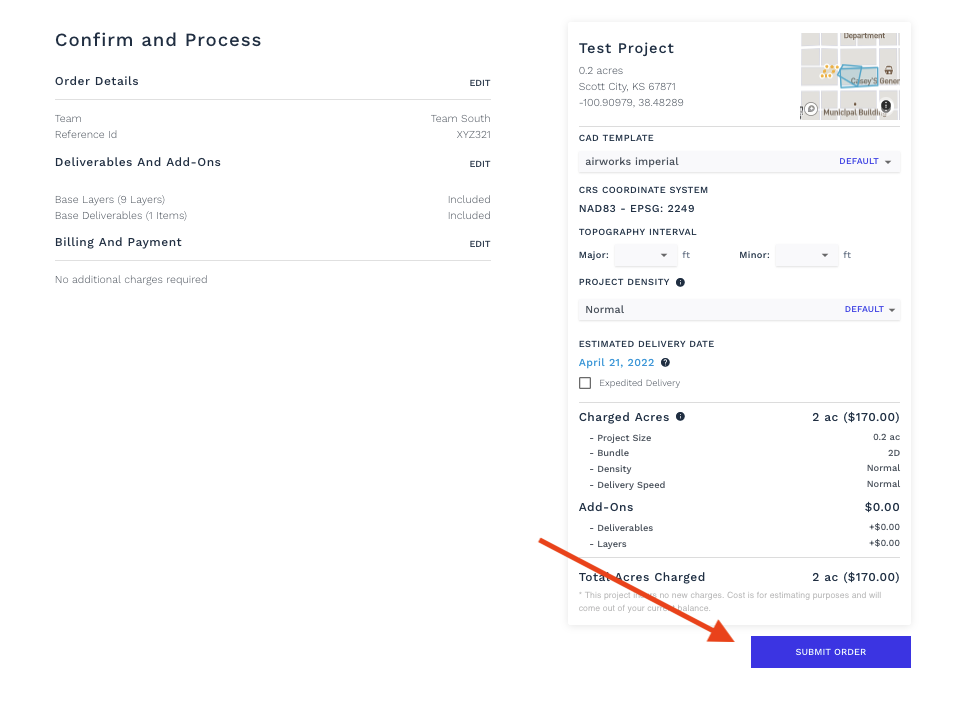
You must click on the blue Submit Order button to place your order. If you forget to click it, your project will not automatically kick-off and delays may occur. As soon as you submit your order, the tile for the project on the main screen in the app will change to our progress bar, and you will receive an email confirmation that your order is underway.
Now, all you have to do is wait. As soon as your project is completed, you will receive both an in-app notification and an email. Learn more about viewing your project deliverables here.
Save Layer Selection for future use
This facility allows you to save the layer selections you made before submitting order to be saved for future use to avoid selecting same layers again and again. Once you save this by your desired name, you can reuse this in your next order.
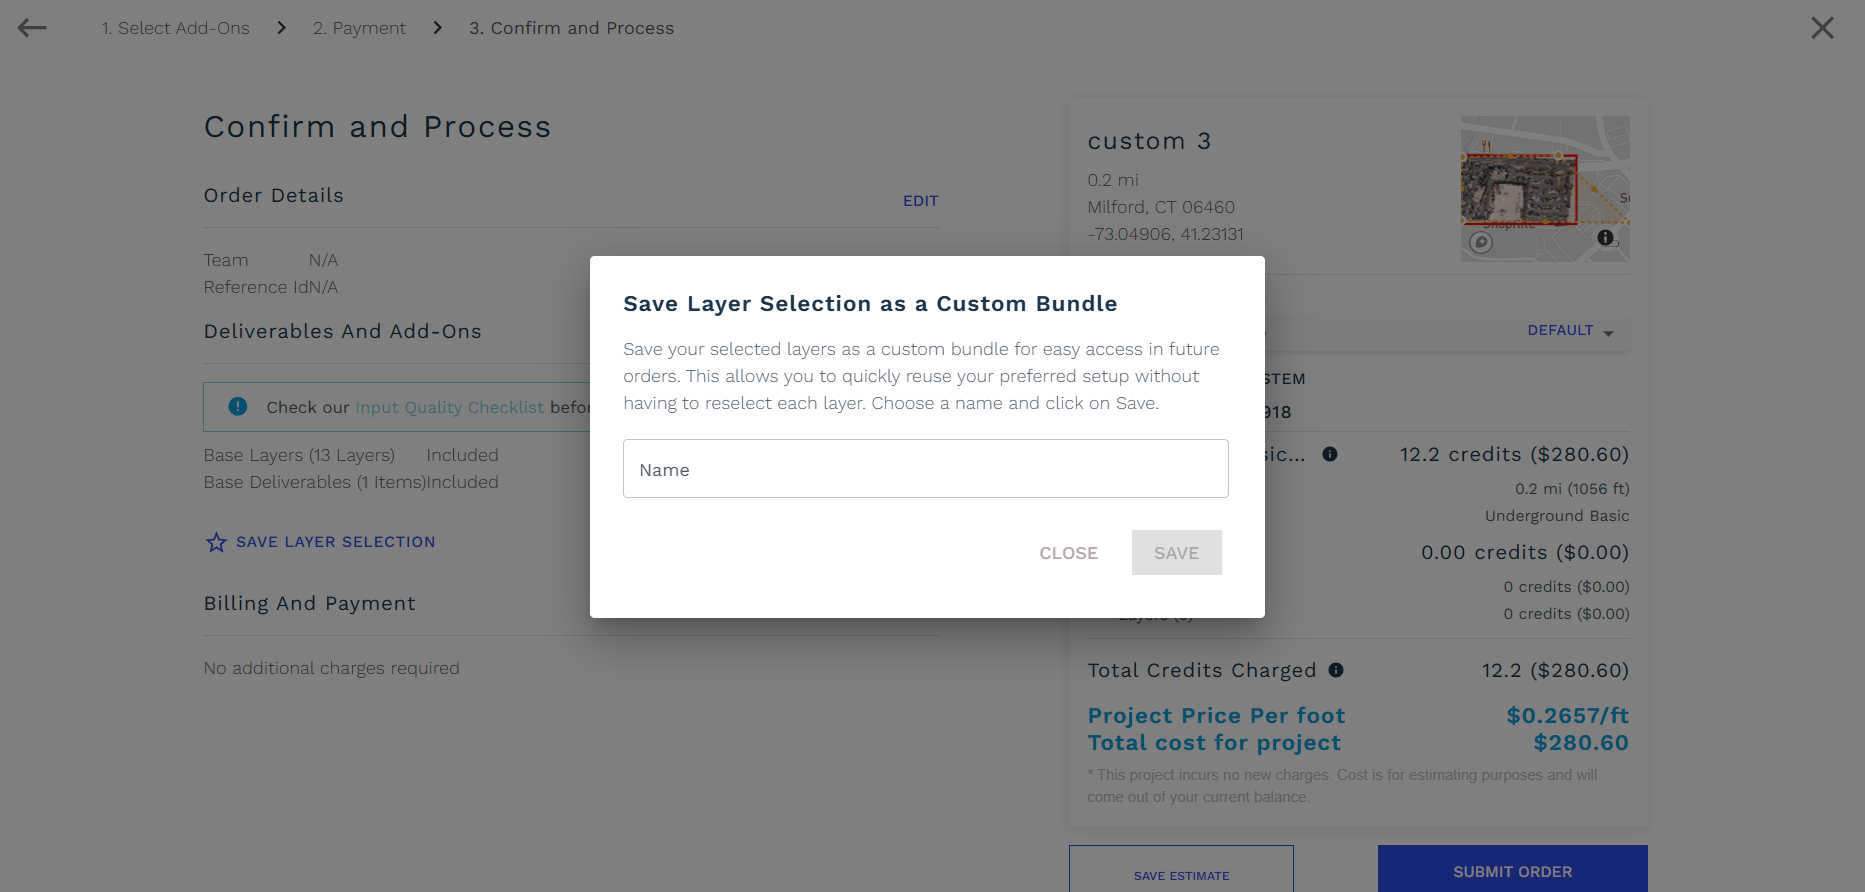
Save Layer Selection
Additional Instructions for extra layers and comments
This is the option which allows you to enter any comments or instructions specific to the order you are submitting. For e.g. if you want any layer which is not listed in deliverables, then you can mention it and Airworks will check if they can provide the same as deliverables. Also, you can put any comments which you feel should be taken care while processing.
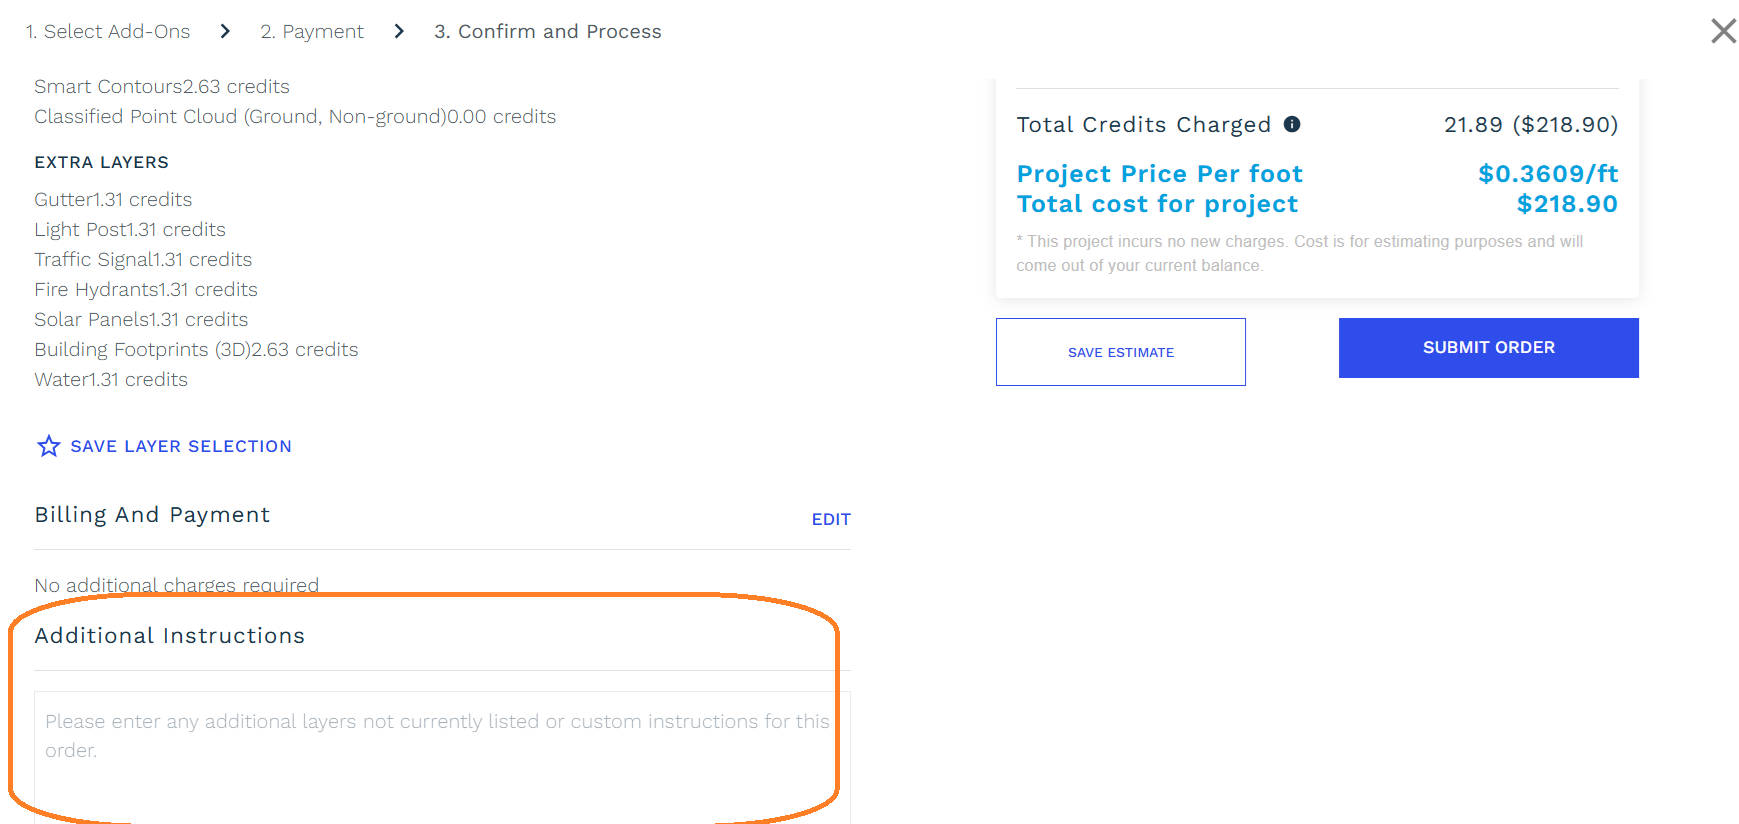
Additional Instructions
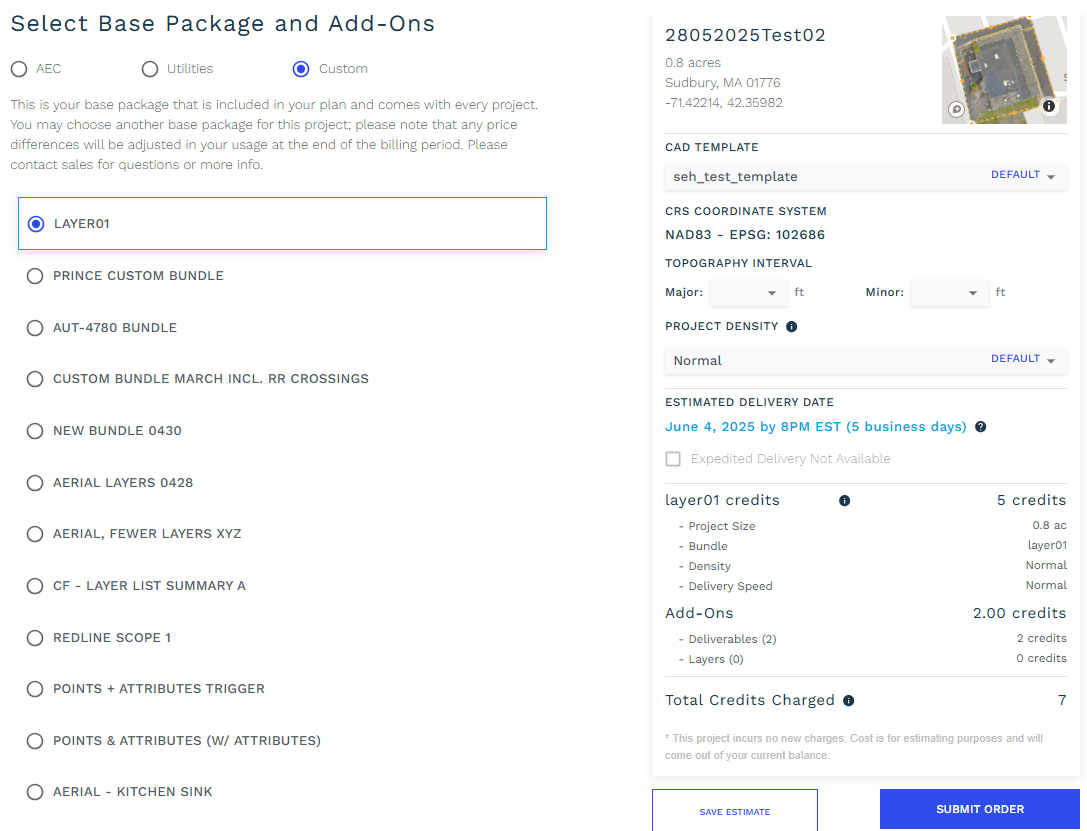
Custom package option
This option becomes usable when you save your layer list selection using “Save Layer Selection” facility (2nd screenshot above). If you save the layer selection by any specific name For e.g. Special Order or Aerial Order etc. then on selecting the custom option you can see them along with layer selection saved.
This allows user to save selecting same layer again and again. With selecting the correct custom layers you can simply submit the order.