How to Apply CRS for TIF files in QGIS
1. Install & open QGIS. Make sure you update it to the newest version.

2. In the bottom right corner, you will see the project coordinate reference system represented as an EPSG code (in this example, you will see “EPSG: 4326”. Click the code to open the “Project Properties – CRS” window. In the CRS tab, under “Filter”, enter the details for your coordinate reference system. Once you select the correct CRS under “Predefined Coordinate Reference Systems”, the text box will populate with metadata and a map displaying the selected CRS information. If everything looks correct, click “Apply”.
3. Under the “Browser” tab, you should see ‘XYZ Tiles’. Expand this option to display ‘Open Street Map’. Click and drag ‘OpenStreetMap’ to the ‘Layers’ tab. This step is not required but is a good check to see if the image moved to the correct location.
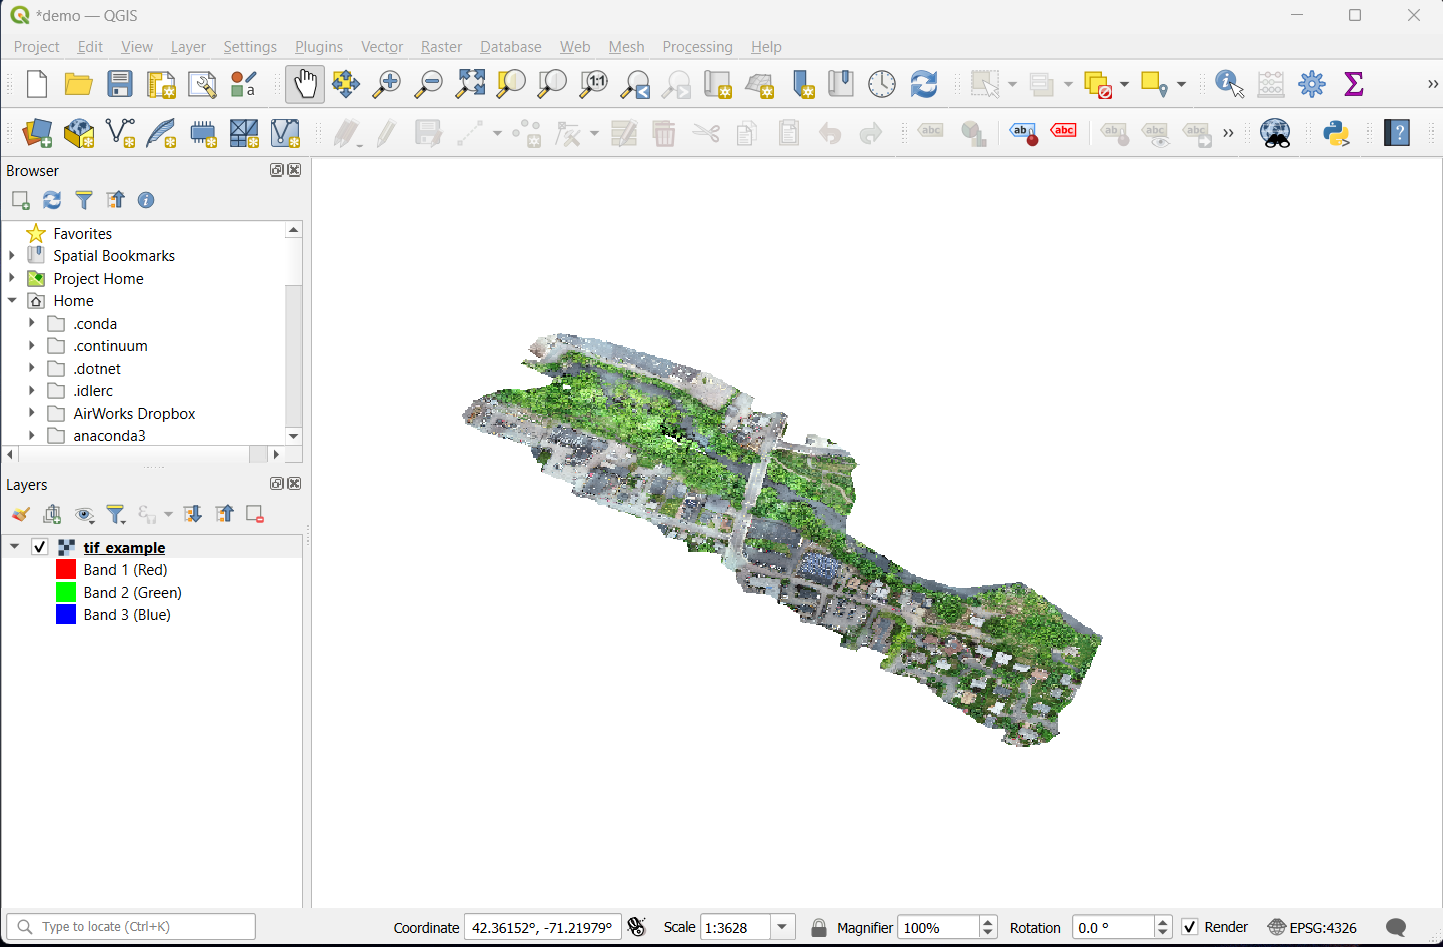
4, To add your tif file, navigate to the folder where your tif file is located and drag/drop the file into the Layers tab. Your tif file should be on top of ‘OpenStreetMap’ to properly display on top of the base map.
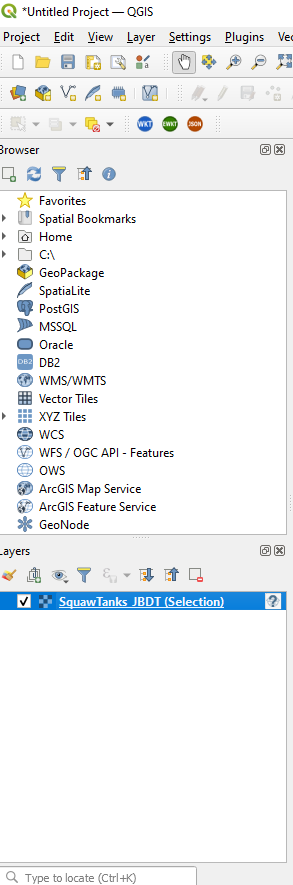
5. When you import a tif file that is missing CRS information, a “?” should appear on the right side of the file name under the ‘Layers’ tab. Click the “?” to open the “Coordinate Reference System Selector” window.
6. Under “Filter”, enter the details for your coordinate reference system. Once you select the correct CRS under “Predefined Coordinate Reference Systems”, the text box will populate with metadata and a map displaying the selected CRS information. If everything looks correct, click “OK”.
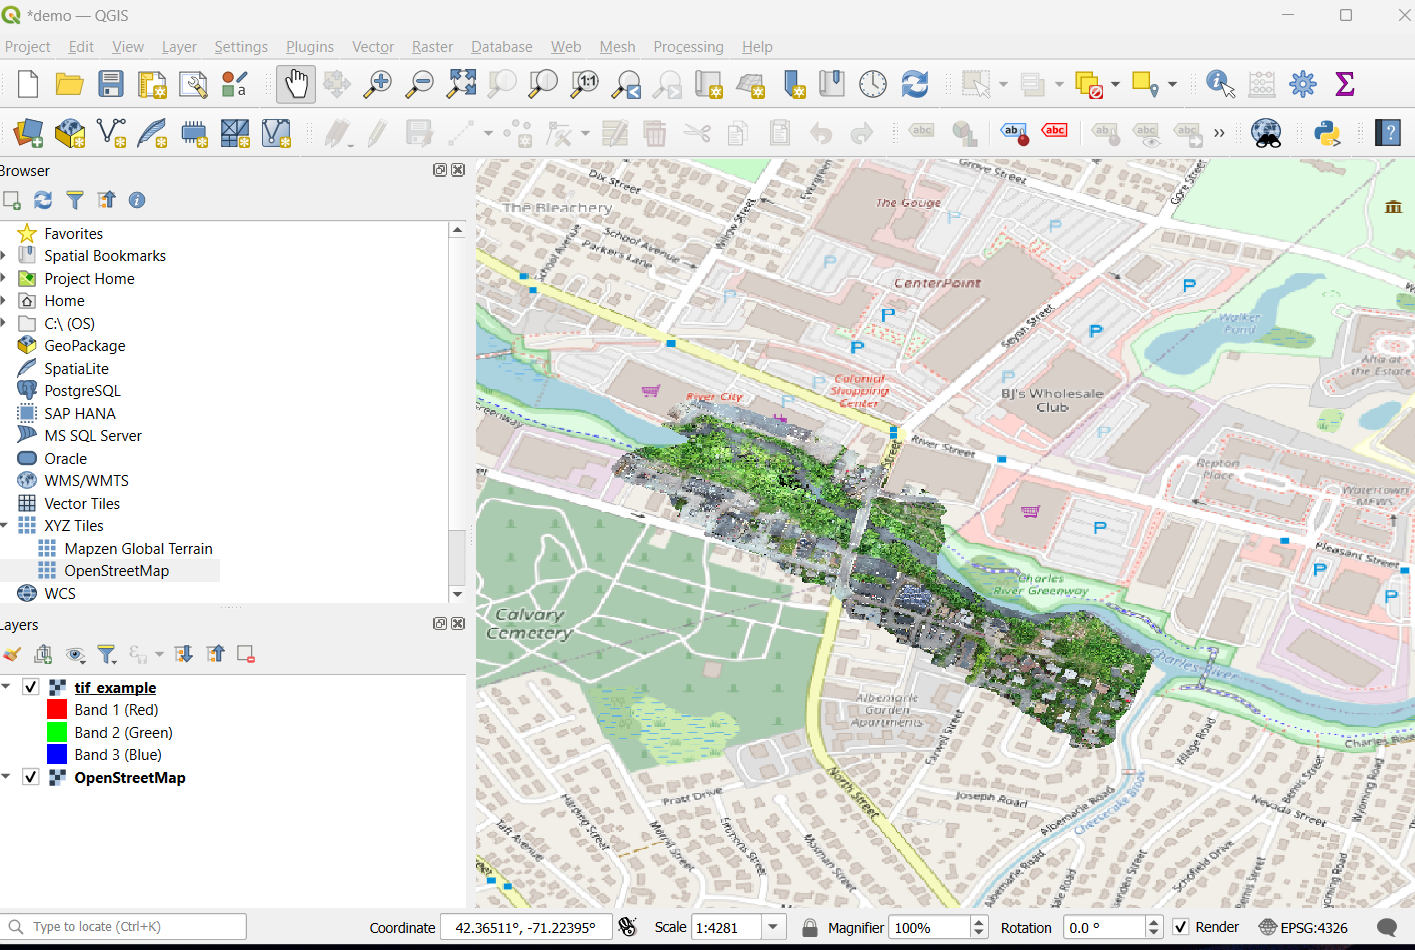
7. Go back to the layers tab, right-click ‘OpenStreetMap’ and select ‘Zoom to Layer’ and then right-click your tif and select ‘Zoom to layer’ and check to see if it is displaying in the correct location over the map.
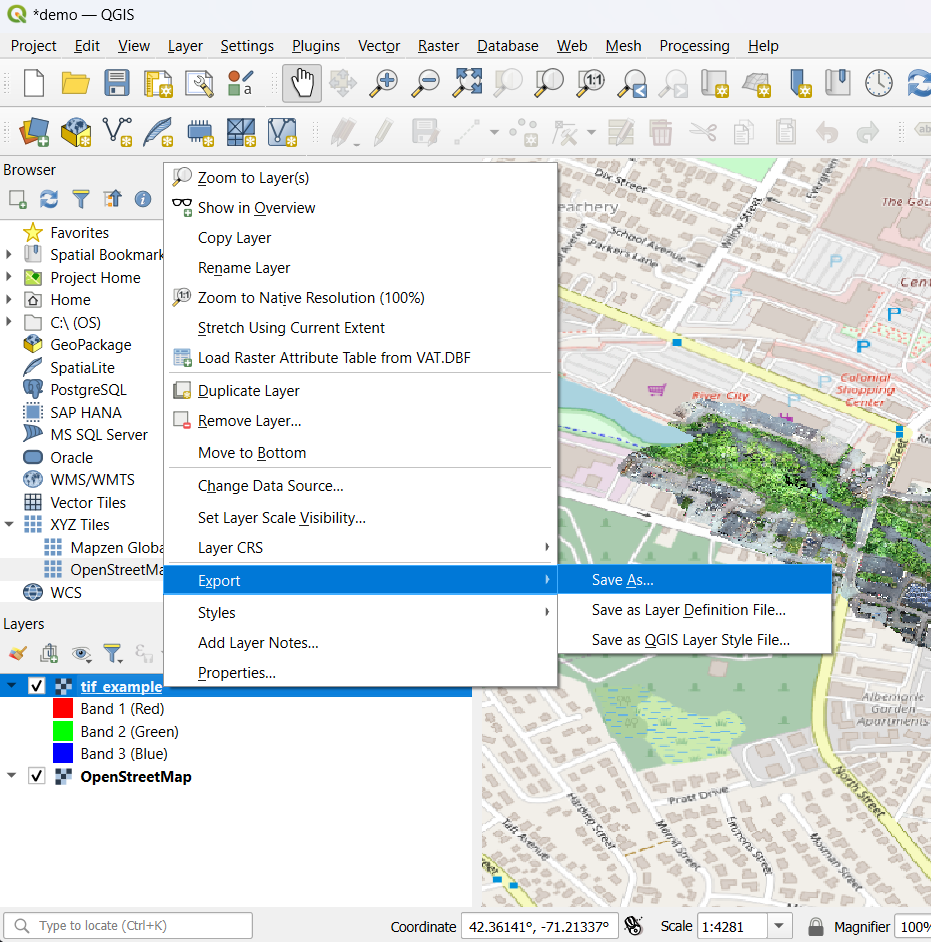
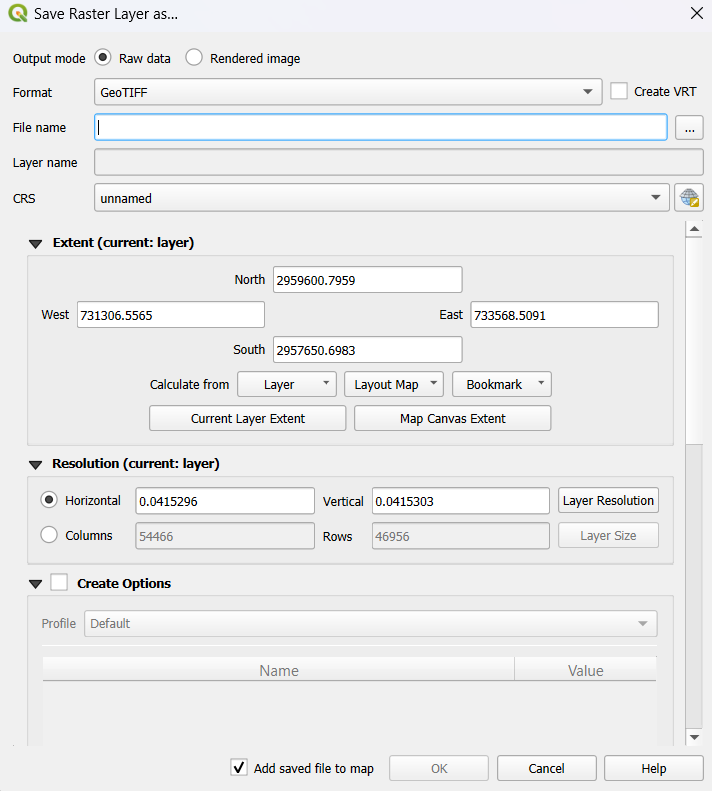
8. Once complete, go back to the layers tab, right-click your tif, select ‘Export’ > ‘Save As’, and save the new version of the GeoTiff to your folder. Check the EPSG code under “CRS” matches the CRS you set.